Kindness

Kindness is essential in our daily lives.
I will share weekly a new post with a message of how powerful kindness really can be.

Monday, March 30, 2015

Gardening by Inspiration


This lingering bitter cold (20ish degrees by day; zero by night) March 2015 winter weather is beginning to make me wonder what kind of summer conditions we can expect following such a chilly Spring. Cold, short, dry, wet or whatever. Bring it on.
  
Looking back on some photos of my 2014 successful gardening endeavors is inspiring me to inspire you!


INSPIRATIONAL FLOWER BED PHOTOS

After many years in the making (lots of TLC) my flower beds are now complete with no muss/no fuss perennials requiring little maintenance; rake in and around some fresh bedding and clean out some over growth and you're good-to-go. Now it's time to pull up a chair, relax and take in their awesome beauty.


Hostas and stella d'oro daylillies circling the wishing well

 
Nice side view

 
A flower bed with a little bit of everything!


A small hodge podge to beautify his garage!


Black Eyed Susans and Day Lilies for camouflage


the front door light which housed a bird nest with eggs!

 
a farm implement for enhancement


and now a bit of whimsy....our new kitten hiding in the hosta bed


Finally a full shade flower bed!


......AND NOW...
(DRUM ROLL PLEASE)


INSPIRATIONAL VEGETABLE GARDEN PHOTOS

THINK POSITIVE. No matter the weather, take the challenge and plant your vegetable garden; look forward to producing fresh and healthy vegetables for eating throughout the coming summer.
 

Tomatoes are easy.

These plum tomatoes are the best for canning.


Carrots are fun!


Peppers are so useful!


 Preserving the bounty of a productive garden ensures healthy eating through the winter months.


String beans always produce an abundant crop.


And always tomatoes!


And don't forget the carrots!


Peppers are easy: wash, slice, bag and freeze.


This is where it all begins for me - starting my plants by seed. There's no going back now!!!


Saving seeds year to year is a fun project and saves $$ too!


...from baby


....halfway there


....ready to go into the ground


this is where all the magic begins after the seedlings get planted


let the games begin: 12 baby peppers and 3 tomato plants


At fruition...carrots, beets, onions, swiss chard, string beans


very productive tomatoes, onions and beets


Let's not forget:

the basil

 
the zucchini


the rhubarb (comes up every year)

 
the Carnival squash and snap peas (in cinder blocks)

 
the garden gnome?


the mint


the cucumbers (growing up on old bed springs)


and last but not least....the chives and the blueberry bushes!


bird's eye picture - taken by a bird in flight - sweet!


Did I say last but not least? What was I thinking?

Ta Da!

Now introducing our original garden that slowly is becoming smaller and smaller since the creation of four raised beds two years ago. Future raised bed production hopefully will some day make this larger garden extinct. So far, through my experience planting in raised beds, I find this method to be easier on the back and the weeding and a bit more productive. Another plus: having it closer to the house keeps the deer and other critters away. (I have a hunch that the sound of the barking dogs confined in the yard are keeping them at bay.)
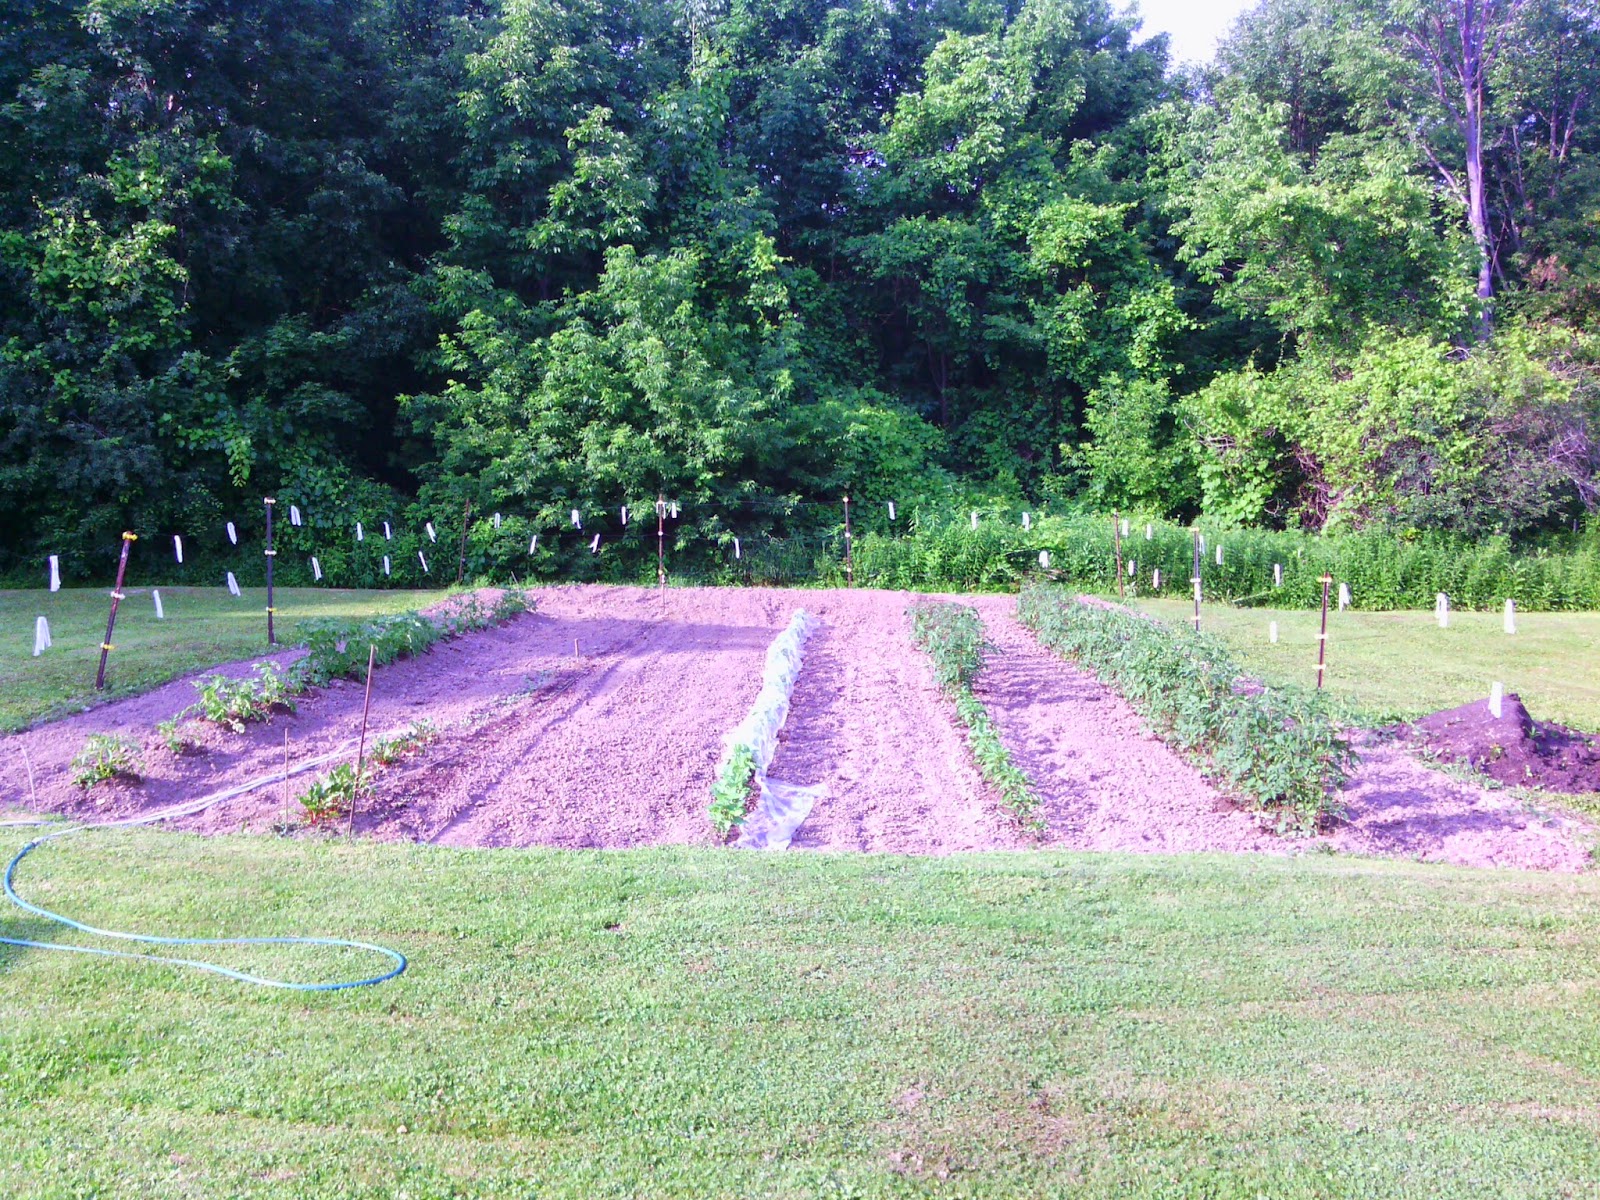
twice as small, very productive but lots of work


side view
(netting covering string beans helps keep critters from eating the tops off)


a row of hilled potatoes


1 1/2 rows tomatoes, 1/2 row onions, 1 row string beans


Blue Lake bush beans hiding under netting


a tomato from a saved seed - a miracle


All of these pictures (with the exception of my 2011 rhubarb patch) are documentation of my 2014 gardening efforts.

These garden photos have inspired me to begin my indoor seed planting, and I hope they have inspired you to strive to plant your own veggie garden in anticipation of achieving great results that will impact your health and budget.
 
Plant a perennial and enjoy the serenity of watching it grow!
 

HAPPY GARDENING 2015


Tuesday, November 11, 2014

Organic Counter Cleaner Homemade

Sometimes during food prep, whether just making a sandwich or preparing a gourmet meal, it's possible for some of the ingredients to come in touch with the kitchen countertop. Because of this it's important to use a 'safe' counter cleaner, one that doesn't leave a toxic footprint.

By following this simple and inexpensive recipe you can be assured that your countertops are not a toxic transfer station.

Only two ingredients are needed to make this terrific organic counter cleaner:

  1. White vinegar
  2. Orange peels


Directions:

Designate a jar large enough to hold the peelings of several large oranges. If you don't have a jar large enough or attractive enough to meet your needs, visit your local thrift store where you can find one that quite possibly will surpass your expectations. Old fashion quart or gallon canning jars work nicely.

To begin, each time you or another member of  your household eats an orange, peel the skin from the orange and place the peel(s) into your chosen designated jar and cover completely with white vinegar. Continue doing so until your jar is completely filled with peels submerged in vinegar.

Soak the orange peels for two or more weeks before transferring the orange-infused vinegar into the spray bottle of your choice. To avoid confusion as to contents, it's best to write on the face of the spray bottle the ingredients within. Store any remainder liquid not fitting into your spray bottle into your designated jar for refill at a later date. Waiting the two-week infusion period is the hardest part.

To use you only need to spray and wipe.

Simple, user-friendly, inexpensive, eco-friendly and one step closer to becoming more self-sufficient.

Really? What are you waiting for. If you don't have oranges to pick from your yard, get to your grocery store soon and buy a bag of oranges.

Rid your home of toxicity, remember:

THE GREATEST WEALTH IS HEALTH
                                            -VIRGIL


Wednesday, July 2, 2014

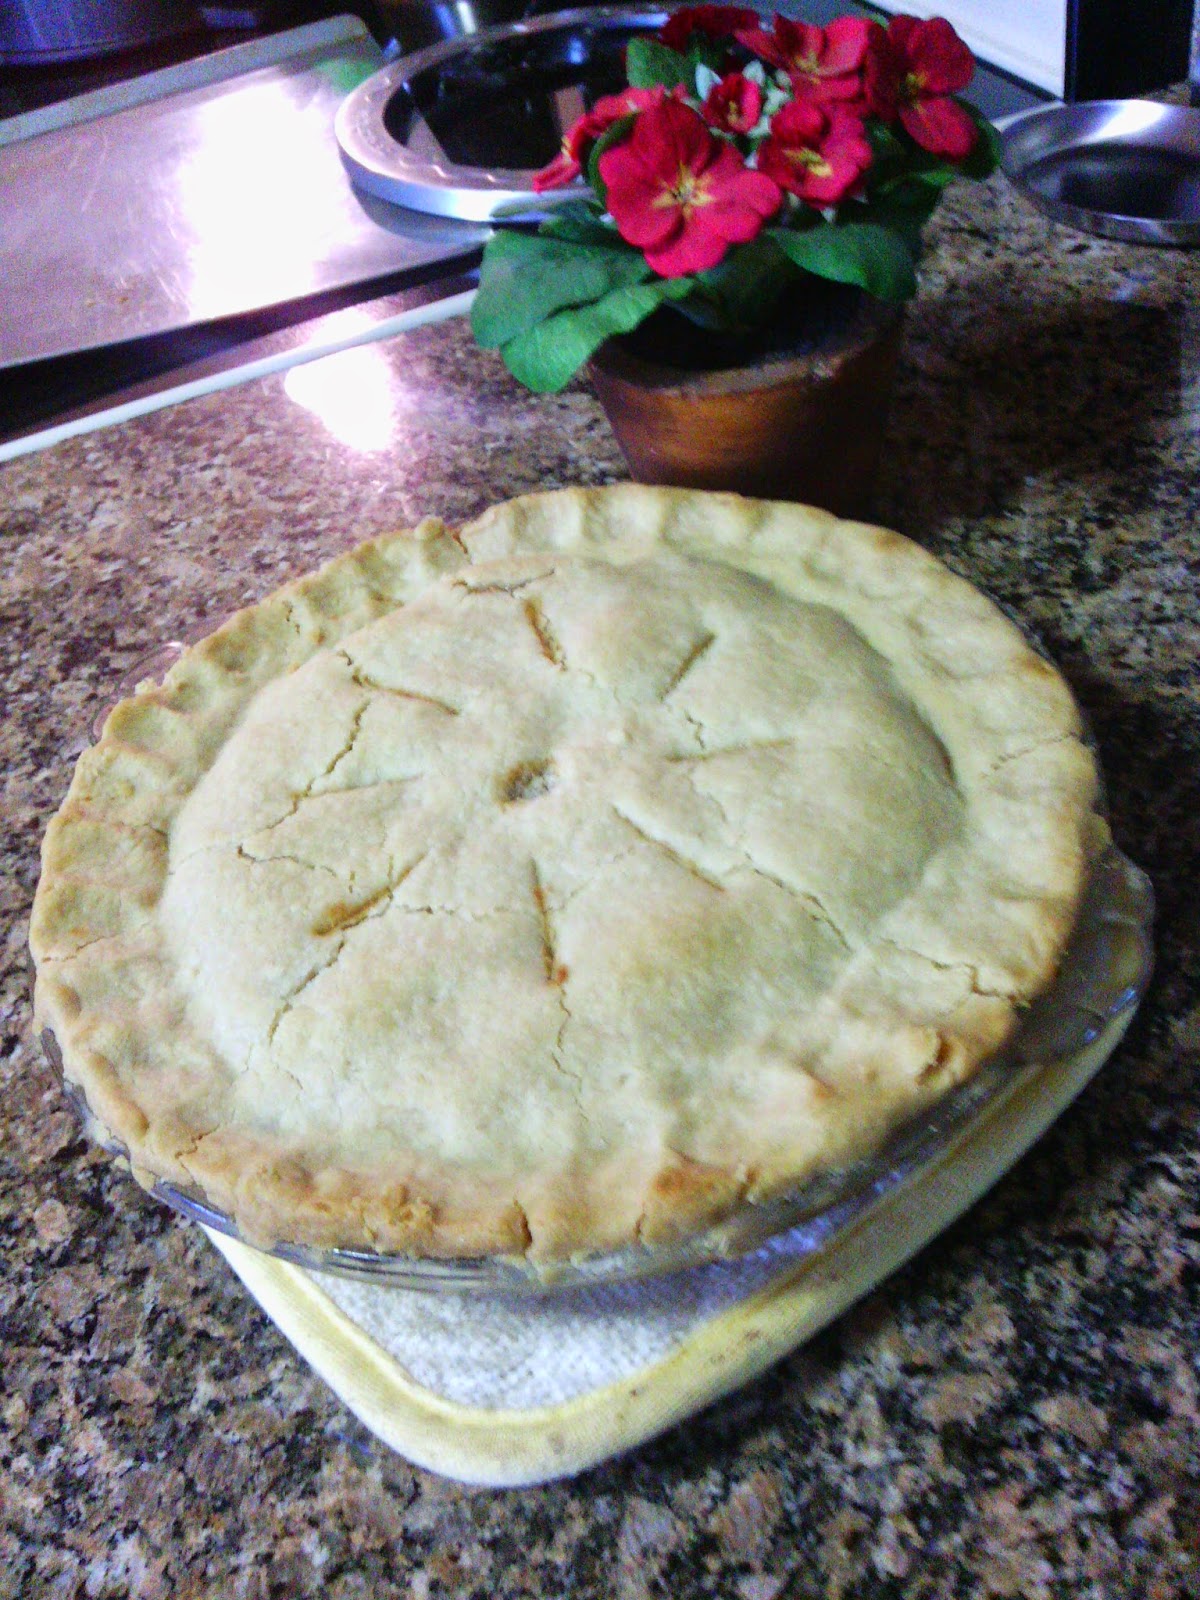
Rhubarb Pie Recipe


Rhubarb, a tart seasonal fruit which usually grows in abundance, is generously shared from neighbor to neighbor, friend to friend, relative to relative, etc. Many children have fond memories of eating freshly picked rhubarb stalks dipped in sugar at one time or another. If you share these memories I bet the juices in your mouth just started flowing. : )


Most often rhubarb is cooked into jams, sauces and pies. Faithfully, for many years, my abundant rhubarb patch has supplied me with enough of a harvest to be able to make many a jar of my favorite jam to enjoy through the winter season, enabled me to bake as many pies as I chose to bake and provided additional crop to share with others. This year the stalks grew tall and very thin so after doing some on-line research I determined it will be necessary to dig and separate them for replanting in the fall. For 24 years this rhubarb patch has proven successful so I'm looking forward to giving it this makeover to ensure another 24 years of good production.

For several years I would spend one day each year with my mother baking as many rhubarb pies as we could physically handle; she made a wicked crust and I made a wicked filling. Assembly-line fashion we would assemble and bake 10-14 pies (we had two ovens going at a time.) After the pies cooled each would be wrapped in it's glass pie plate appropriately for freezing. We both owned large freezers which housed them through the winter. For serving as dessert on a cold winter day, it was only necessary to pull out a frozen pie, place it in the oven (or toaster oven) until heated through, and serve - with or without ice cream. Nothing, absolutely nothing, can ever surpass the memories of this time spent with my mom and the rewards of our fruits of labor.....reason being why I want to share this terrific recipe for our old-time rhubarb pie.


RHUBARB PIE
(filling)
 
3 c. rhubarb, diced
1 3/4 c. sugar
2 eggs, beaten
2 tbsp. milk
3 tbsp. flour
1/2 tsp. cinnamon
pie crust for one pie
butter
 
Combine rhubarb and sugar; let set until juice appears.
Add eggs, milk, flour and cinnamon to rhubarb.
Pour mixture into pie shell; dot with butter.
Cover with top crust.
Put slits into top crust to avoid bubbling over.
Bake at 400 degrees for 50 minutes to 1 hour
(until bottom crust is brown.)
Tip: cover edge of crust with foil to prevent burning.
 
 
PIE CRUST
(makes 1 top and 1 bottom)
 
combine:
3 c. flour
1 1/2 c. Crisco
1 tsp. salt
 
mix in separate bowl:
1 egg beaten
1 tsp. white vinegar
12 c. half & half or milk
drop of vanilla
 
Combine all ingredients.
Separate into two balls wrapping each individually
in plastic wrap.
Store overnight in refrigerator or freeze for better roll-out
 
 
ENJOY!!!


Sunday, December 8, 2013

Homemade Dog Shampoo on a Dime


Dog beautification.

That's what it's all about, right?

Saving dollars in the process doesn't hurt either.

Just like my food recipes, this homemade dog shampoo recipe is short and simple and extremely cost effective...like less than a $1.00...ah, now I have your attention. ; )

Most of those in my circle of friends and relatives elevate the status of their pet(s) to a higher level than most. This only means they regularly maintain their pet's health and well-being so kitty or doggie are happy, healthy and smell good vs being tied outdoors 24/7 with no water and/or food, collecting fleas and receiving no medical attention while performing guard dog duties (if you know what I mean.)

I make every effort to plan once a month to bathe my two dogs*, Libby Lu Jenkins (on the left) and Ginger, (on the right) followed by their  monthly application of flea and tick treatment. Looking to add more to my want-to-be-more-self-sufficient list, a couple of years ago I experimented with making homemade dog shampoo. Realizing the cost of dog food, vet bills, etc. which are given expenses, why not take a cost savings where possible. I see you agree; now let's get down to business.

THE REAL DEAL

Homemade Dog Shampoo Recipe:

1 Cup Dawn Dish Detergent
1 Cup White Vinegar
1 Quart Warm Water

It's as simple as combining these 3 simple ingredients together in a large bowl and using a funnel to transfer into your preferred storage container(s). The recipe produces approximately 50+ ounces of effective cost-saving dog shampoo one can be proud of. : )

As you can see in this picture, to store my recipe I use an old plastic dog shampoo bottle that I previously purchased a few years ago and poured the remaining recipe in a glass quart canning jar sealed with a plastic screw top that can be purchased at places like Walmart in both pint and quart sizes.

In the past I have used regular scent Dawn in the blue bottle. But, here's the kicker, for enhanced fragrance a Dawn product with Olay Beauty Pomegranate Splash Scent in pink color is now available. The 'Divas" smelled absolutely awesome following their 'Pomegranate' bath and the 'Olay' has their hair silky smooth. Quite impressive!!

I paid $0.99 for the 9 fl. oz. of Dawn, had the white vinegar in the pantry and figured this cost less than $0.02 an ounce. After all was done there was still one ounce of Dawn left in the bottle to use in the kitchen for washing dishes.

I challenge you with this cost savings.
 
Please, by all means, share with me a better, more cost-effective homemade dog shampoo that actually does as good a job; I'm listening...
 

and join me on the band wagon of becoming more self-sufficient.


* For those who may be curious what breed my girls are I'll share that Libby Lu Jenkins is a Puggle (cross between a Pug and a Beagle) and Ginger is a Jug (cross between a Jack Russell Terrier and a Pug.) For more information regarding their adoption details, please check out my Canine and Feline Companions page.


Thursday, October 31, 2013

The Relationship Between the Tenant and the Landlord

Wearing the hat of a Landlord never is fun and games, especially if you're an emotional individual with a soft spot in your heart. Although necessary, it is extremely difficult to separate yourself emotionally and look at land-lording as a business.

Disputes happen. Most of the time there are resolutions. Many times things remain the same, at which time the Landlord must take action.

The eviction process causes a great deal of stress on the Landlord (mentally, physically, emotionally and financially.) To eliminate this stress, the Landlord generally makes every effort to resolve these issues but when lies, denial and disrespect enter into the picture there is no alternative but to bring the situation to an end via eviction.

The following case scenarios are an indication that the end result will be eviction:

Dispute #1:   What caused the kitchen sink to overflow three times?

What do you mean a dish rag was accidentally left in the sink drain?
What do you mean the drain was clogged? Why wasn't it reported?
Do you understand this water overflow is doing damage to the unit below you at a great expense?
It was just an accident?

Resolution #1:

None.


Dispute #2:  The one-piece flooring is peeling around the edges of the kitchen floor caused by the kitchen sink overflowing.

Why is a resident ripping these loose pieces up and off?
Why didn't you call us and report the situation?
What do you mean it was like this when you moved in?
Don't you remember we repaired it once following a code enforcement inspection on your behalf?
Why is this now happening on the other side of the room?
Normal wear and tear you say?
It wasn't your fault?

Resolution #2:

None; denial.


Dispute #3:  You know your rent is due on the 1st of each month; why does it arrive routinely during the 2nd - 3rd week of the month?

You say you had car repairs, school supplies, etc., etc.?
Why am I not notified?

Resolution #3:

None.
No promises; too many unexpected monthly expenses.


Dispute #4:  Why is there a fist-sized hole in the center of one of the bedroom doors?

That's not new?
It's been there for awhile?
Why wasn't it reported?

Resolution #4:

None.


Dispute #5:  Your lease states that the premises shall be occupied by you and your two children.

Who is the other woman living there and the additional three children?
You've invited your friend and her children to live with you because her home was condemned and they have nowhere else to live?
Why are they still there after you received written notice from your Landlord asking you to have them move out?

Resolution #5:

None.


Dispute #6:  It was reported by a third party that the front entry door to your unit (made of steel) would not stay shut and annoyingly banged open and shut.

You knew it wouldn't stay shut?
You didn't report it?
The repair man reported that the door was kicked in from the outside so hard it caused damage to the door jam resulting in major repair.
No way, you say, that the door had been kicked in?

Resolution #6:

None; denial.


Dispute #7:  The water from the kitchen sink overflowed into the dining room causing large wrinkles in the wall-to-wall carpet.

Resolution :#7:

None; no defense.


Dispute #8:  The kitchen floor as well as the back stairway are desperately in need of mopping/scrubbing. Walking in these unkempt sticky areas allows for tracking this sticky matter throughout the rest of the unit resulting also in dirty carpeting and a bug and/or rodent infestation.

A fifteen day written request to eliminate this situation was given verbally and in writing.

Resolution #8:

None.
More than 15 days later the floor remains unkempt and sticky.


Dispute #9:  Failure to take responsibility serious for maintaining smoke detectors in working order.

Resolution #9:

None; no defense.


Verbally disputed and denied: broken window glass; friend observed in drug deal on premises whereas police were called; several unsupervised teenage boy guests partying on the premises after midnight annoying other residents; garbage improperly placed in receptacle(s);

NOTE:

  1. In addition to paying rent, the tenant's other obligations are to keep their rental unit clean, safe and free from unnecessary damage.

  2. There is no room in a Landlord/Tenant relationship for lies, denial, or lack of respect.

  3. Honest open communication on both parts is required to prevent a trip to the courthouse.


Tuesday, July 23, 2013

Blueberry Muffin Recipe

PRELUDE TO A BLUEBERRY MUFFIN RECIPE:

For some unknown reason, although blueberries are fairly easy to grow, many of us are not inclined to plant them in our landscape and/or gardens. Blueberry bushes, as they grow, produce lots of berries which are both delicious and good for our health - reason being I decided to plant a few bushes here at home amongst the veggies in my raised beds. Growing them at home will also save me the time and money spent traveling and the cost of the berries themselves. I purchased my bushes at a local nursery where I could trust the employees to provide me with the pertinent information required for properly planting and providing for them. It was recommended, for cross-pollination purposes, to plant more than one bush so I bought three different types. Having planted them just this Spring it's amazing that I've been able to pick handfuls at a time for cooking with pancakes, eating on cereal and mixing them with yogurt. Not only that, I know exactly what type of pesticide was used on my berries - NONE!

This year I picked six quarts of blueberries at a local blueberry field where the only thing they grow is blueberries. I gave two quarts away;

used two quarts to produce 10 jars of delicious blueberry jam;


used 1 1/2 cups for making a dozen blueberry muffins
(note 3 are missing - taste testing - yum);
 

and froze the remaining berries so I can make more yummy blueberry muffins during our too long and too cold winter.

Freezing the blueberries really is a very easy process. First, using a strainer,wash the berries and pick through them to remove any stems or leaves that may have fallen in your quart.


Spread them out in a single layer on a large cookie sheet (preferably one that has sides)
and place them flat on a shelf in your freezer. 

After they have frozen, you simply transfer them from the tray into your preferred size freezer bag(s) and take out only the amount of frozen blueberries you'll need per recipe as required.


WHOOPIE...HERE COMES THE BLUEBERRY MUFFIN RECIPE
(best one I've ever tasted, so well worth the wait) 

Ingredients:

1 large egg, lightly beaten
1 cup plain or vanilla yogurt (full fat or low fat)
1/3 cup vegetable, canola, safflower, or corn oil
1 teaspoon pure vanilla extract
2 cups all-purpose flour
1/2 cup granulated white sugar
1 1/4 teaspoons baking powder
1/2 teaspoon baking soda
1/4 teaspoon salt
1 - 1 1/2 cups fresh or frozen blueberries (if using frozen blueberries, do not thaw before adding them to the batter)

Directions:

Preheat oven to 375 degrees F (190 degrees C). Position rack in center of oven. Butter or line 12 muffin cups with paper liners.

           In a large bowl whisk together the lightly beaten egg, yogurt, oil, and vanilla extract.

In another large bowl whisk the flour with the sugar, baking powder, baking soda, and salt.

Gently stir the blueberries into this dry mixture.

Using a rubber spatula, fold the wet ingredients into the dry ingredients and
stir only until the ingredients are combined and moistened. (The batter will be thick.)
 

Evenly fill the muffin cups with the batter, using two spoons or an ice cream scoop.
 

Place in the oven and bake for 20 minutes (+/- depending on your oven)
or until a toothpick inserted in the center of a muffin comes out clean.
Let cool for about 10 minutes before removing from the pan.
Makes 12 good-size muffins.


ENJOY!
 I PROMISE, YOU WON'T BE DISAPPOINTED!!

Note: This recipe was borrowed from www.joyofbaking.com where instructions are provided via a video.


-->