Kindness

Kindness is essential in our daily lives.
I will share weekly a new post with a message of how powerful kindness really can be.
Showing posts with label Recipe Box. Show all posts

Monday, April 4, 2016

Chocolate Banana Bundt Cake Recipe

Waking up to six slightly brown bananas today - almost past expiration - inspired me to do something with them other than put them in the compost pot. I ate one with breakfast as usual and decided a dessert needs to be created. Regular cakes need to be frosted; Bundt cakes can do with a little drizzle or just a shake of confectionery sugar. No brainer - a Bundt cake will be in the making. This recipe is really a quick and simple recipe for such a decadent desert....and the ingredients most often are stocked in the pantry. On another note, following this recipe I'll suggest some useful ways to use your banana peels and your egg shells.

Ingredients:

1 1/4 cup flour
1 tsp baking powder
1/2 tsp baking soda
1/2 cup cocoa powder
1/4 tsp salt
1 tsp instant coffee (optional)
1/2 cup butter
2 eggs
1 cup banana (very ripe & mashed - about 3)
1 cup chocolate chips

Directions:

Preheat oven: 350 F degrees

Grease/spray Bundt pan and lightly dust with a little cocoa powder.


Mix dry ingredients and set aside.


Cream butter, add sugar and eggs and mix well.


Add bananas and mix briefly.


Mix in dry ingredients until incorporated (don't over mix.)


Stir in chocolate chips.


Pour into prepared pan.


Bake 50-60 minutes until it tests done;

cake will just start to pull away from the edges.

Cool slightly then remove from pan.


Dust with confectionery sugar to your liking.


ENJOY!!!


......... and then .........
from my counter to yours

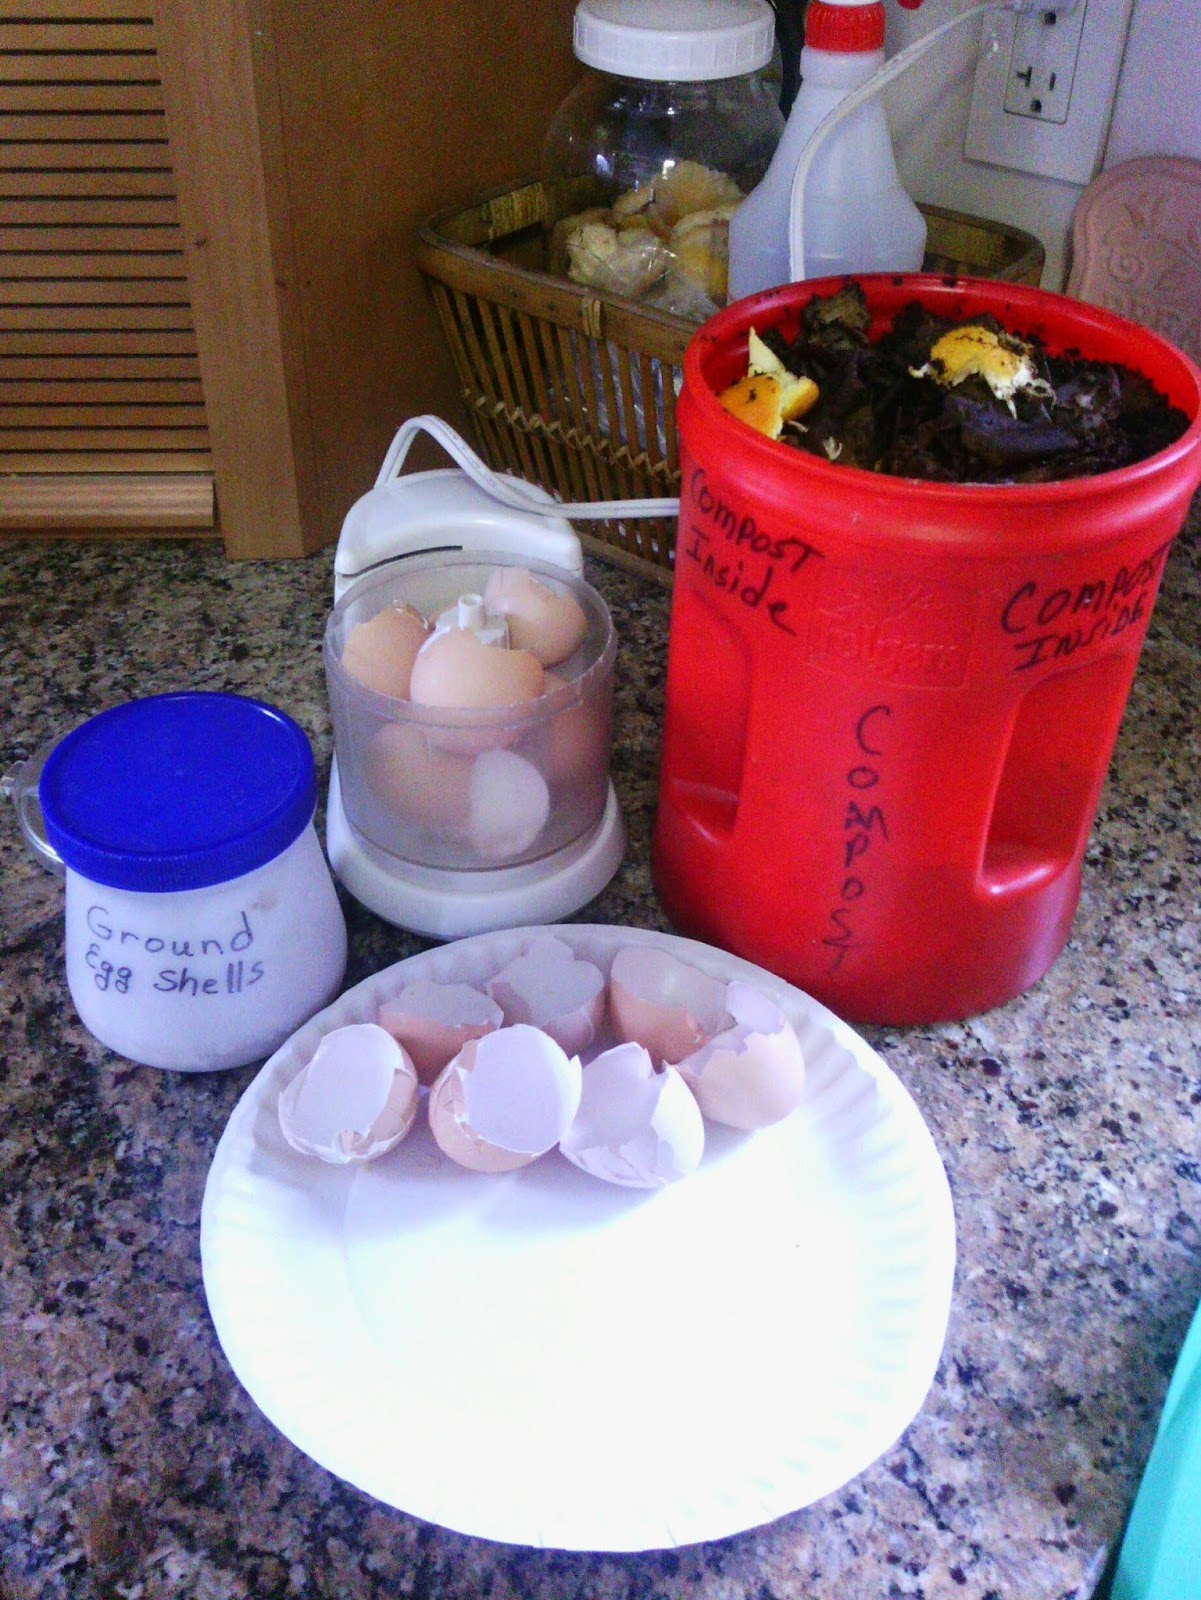
you can crush and store your egg shells

to spread around the base of your tomato plants

during warm weather gardening to help prevent disease


..... and .....

you can put your banana peels in your compost.
.


-->

Wednesday, July 2, 2014

Rhubarb Pie Recipe


Rhubarb, a tart seasonal fruit which usually grows in abundance, is generously shared from neighbor to neighbor, friend to friend, relative to relative, etc. Many children have fond memories of eating freshly picked rhubarb stalks dipped in sugar at one time or another. If you share these memories I bet the juices in your mouth just started flowing. : )


Most often rhubarb is cooked into jams, sauces and pies. Faithfully, for many years, my abundant rhubarb patch has supplied me with enough of a harvest to be able to make many a jar of my favorite jam to enjoy through the winter season, enabled me to bake as many pies as I chose to bake and provided additional crop to share with others. This year the stalks grew tall and very thin so after doing some on-line research I determined it will be necessary to dig and separate them for replanting in the fall. For 24 years this rhubarb patch has proven successful so I'm looking forward to giving it this makeover to ensure another 24 years of good production.

For several years I would spend one day each year with my mother baking as many rhubarb pies as we could physically handle; she made a wicked crust and I made a wicked filling. Assembly-line fashion we would assemble and bake 10-14 pies (we had two ovens going at a time.) After the pies cooled each would be wrapped in it's glass pie plate appropriately for freezing. We both owned large freezers which housed them through the winter. For serving as dessert on a cold winter day, it was only necessary to pull out a frozen pie, place it in the oven (or toaster oven) until heated through, and serve - with or without ice cream. Nothing, absolutely nothing, can ever surpass the memories of this time spent with my mom and the rewards of our fruits of labor.....reason being why I want to share this terrific recipe for our old-time rhubarb pie.


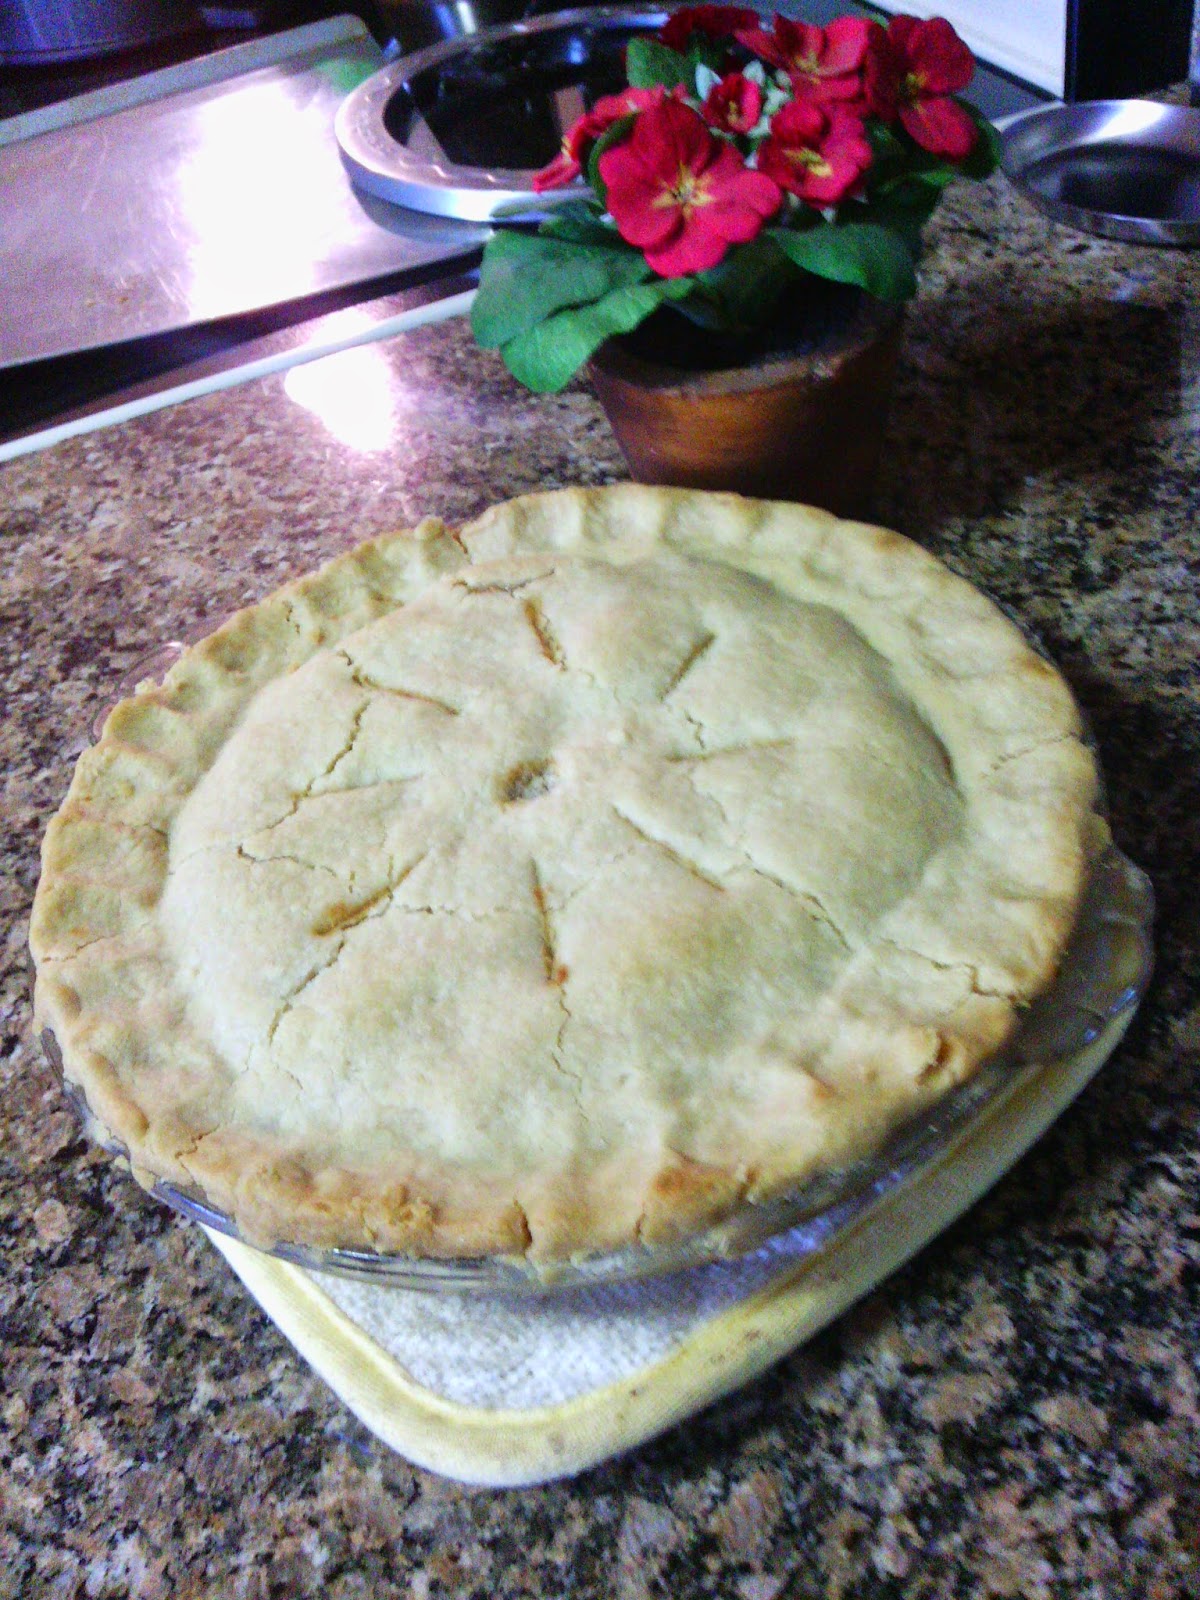
RHUBARB PIE
(filling)
 
3 c. rhubarb, diced
1 3/4 c. sugar
2 eggs, beaten
2 tbsp. milk
3 tbsp. flour
1/2 tsp. cinnamon
pie crust for one pie
butter
 
Combine rhubarb and sugar; let set until juice appears.
Add eggs, milk, flour and cinnamon to rhubarb.
Pour mixture into pie shell; dot with butter.
Cover with top crust.
Put slits into top crust to avoid bubbling over.
Bake at 400 degrees for 50 minutes to 1 hour
(until bottom crust is brown.)
Tip: cover edge of crust with foil to prevent burning.
 
 
PIE CRUST
(makes 1 top and 1 bottom)
 
combine:
3 c. flour
1 1/2 c. Crisco
1 tsp. salt
 
mix in separate bowl:
1 egg beaten
1 tsp. white vinegar
12 c. half & half or milk
drop of vanilla
 
Combine all ingredients.
Separate into two balls wrapping each individually
in plastic wrap.
Store overnight in refrigerator or freeze for better roll-out
 
 
ENJOY!!!


Tuesday, July 23, 2013

Blueberry Muffin Recipe

PRELUDE TO A BLUEBERRY MUFFIN RECIPE:

For some unknown reason, although blueberries are fairly easy to grow, many of us are not inclined to plant them in our landscape and/or gardens. Blueberry bushes, as they grow, produce lots of berries which are both delicious and good for our health - reason being I decided to plant a few bushes here at home amongst the veggies in my raised beds. Growing them at home will also save me the time and money spent traveling and the cost of the berries themselves. I purchased my bushes at a local nursery where I could trust the employees to provide me with the pertinent information required for properly planting and providing for them. It was recommended, for cross-pollination purposes, to plant more than one bush so I bought three different types. Having planted them just this Spring it's amazing that I've been able to pick handfuls at a time for cooking with pancakes, eating on cereal and mixing them with yogurt. Not only that, I know exactly what type of pesticide was used on my berries - NONE!

This year I picked six quarts of blueberries at a local blueberry field where the only thing they grow is blueberries. I gave two quarts away;

used two quarts to produce 10 jars of delicious blueberry jam;


used 1 1/2 cups for making a dozen blueberry muffins
(note 3 are missing - taste testing - yum);
 

and froze the remaining berries so I can make more yummy blueberry muffins during our too long and too cold winter.

Freezing the blueberries really is a very easy process. First, using a strainer,wash the berries and pick through them to remove any stems or leaves that may have fallen in your quart.


Spread them out in a single layer on a large cookie sheet (preferably one that has sides)
and place them flat on a shelf in your freezer. 

After they have frozen, you simply transfer them from the tray into your preferred size freezer bag(s) and take out only the amount of frozen blueberries you'll need per recipe as required.


WHOOPIE...HERE COMES THE BLUEBERRY MUFFIN RECIPE
(best one I've ever tasted, so well worth the wait) 

Ingredients:

1 large egg, lightly beaten
1 cup plain or vanilla yogurt (full fat or low fat)
1/3 cup vegetable, canola, safflower, or corn oil
1 teaspoon pure vanilla extract
2 cups all-purpose flour
1/2 cup granulated white sugar
1 1/4 teaspoons baking powder
1/2 teaspoon baking soda
1/4 teaspoon salt
1 - 1 1/2 cups fresh or frozen blueberries (if using frozen blueberries, do not thaw before adding them to the batter)

Directions:

Preheat oven to 375 degrees F (190 degrees C). Position rack in center of oven. Butter or line 12 muffin cups with paper liners.

           In a large bowl whisk together the lightly beaten egg, yogurt, oil, and vanilla extract.

In another large bowl whisk the flour with the sugar, baking powder, baking soda, and salt.

Gently stir the blueberries into this dry mixture.

Using a rubber spatula, fold the wet ingredients into the dry ingredients and
stir only until the ingredients are combined and moistened. (The batter will be thick.)
 

Evenly fill the muffin cups with the batter, using two spoons or an ice cream scoop.
 

Place in the oven and bake for 20 minutes (+/- depending on your oven)
or until a toothpick inserted in the center of a muffin comes out clean.
Let cool for about 10 minutes before removing from the pan.
Makes 12 good-size muffins.


ENJOY!
 I PROMISE, YOU WON'T BE DISAPPOINTED!!

Note: This recipe was borrowed from www.joyofbaking.com where instructions are provided via a video.


-->

Monday, February 11, 2013

Homemade Kahlua Recipe

I was totally blown away during a 'google' episode when I came upon a recipe for homemade Kahlua. Further searching revealed that there were several different ways to make it - with instant coffee, fresh ground coffee, plain brewed coffee, etc. Sure, Kahlua is a tasty beverage but I would have never in a million years believed the flavor could be duplicated in the confines of my very own comfy kitchen. As another step in being self-sufficient, I accepted the challenge to make homemade Kahlua as follows:


Ingredients:

  • 6 cups of your favorite brand of brewed coffee
  • 1 lb brown sugar
  • 3 1/2 Tbsp vanilla extract
  • 2 cups of vodka


 Directions:
While the coffee is still hot, mix in the brown sugar

Let the mixture cool

Mix in vanilla and vodka


Using a funnel, pour the liquid into an appropriate bottle for storage


 Serve over ice or in a mixed drink of your choice


TIP:

Cutting the recipe in half makes the perfect amount to fill a smaller previously used (and empty) Kahlua bottle. : )


This is a winner - simply simple and delicious!


Monday, August 20, 2012

How to Make Your Own Pita Chips

On the cheap and simple.....make your own Pita Chip snacks....for dips....(especially Hummus)....or just pop them in your mouth as is.


What you'll need to make this happen:

1 pack of pita bread (buy day old and really save $$$)
olive oil
2 small bowls
pastry brush
sea salt (not pictured)

favorite seasonings (optional): garlic powder, chili powder, Parmesan cheese, cinnamon & sugar, etc.
large cookie sheet
pre-heated 400 degree oven


Instructions:

Start with a multi-pack of pita bread (my preference is whole wheat.) Place 1-3 of the pita bread circles onto a cutting board and using a large sharp knife (non-serrated) cut them into 4 strips/sections. Cut each strip into several triangle shapes about 2" in size. Because the pita bread is a two-sided pocket, separate each cut triangle into 2 pieces and lay them onto a cutting board.


Pour a small amount of olive oil and sea salt into two separate small bowls. While the cut pita triangles are laying on the cutting board use the pastry brush to slightly brush the top side of each cut piece. Add a small sprinkling of sea salt to the top 'oiled' side of the pita triangle (or more if you like.) If you are planning to flavor your pita, now is a good time to do so.


Place as many of the 'oiled' pita triangles as close as possible onto your cookie sheet without layering them. Place the cookie sheet into the pre-heated 400 degree oven and bake for 5 minutes until they are crisp and lightly browned. My oven heats hotter to the back so after 3 minutes I rotate the front to the back for the last 2 minutes for even baking. Most cooks know how their oven heats and will make these types of necessary adjustments. Transfer the baked pita triangles onto a heat-proof serving plate when finished baking. It only takes a few minutes for them to cool. If you make a large amount of these you can store them in some type of a plastic bag (with either a tie or zipper) - even an empty bread bag will work.

As I'm always preaching,  make it from scratch. It's so much cheaper, tastier and maybe even healthier because you made it the way you wanted to! It's also such a simple recipe you might want to include the little ones in helping prepare them - teach them the art of scratch cooking while they're young - develop fond memories they can take with them into adulthood!


ENJOY!


Wednesday, June 27, 2012

How to Bake Hard-Boiled Eggs in the Oven

I absolutely love The Egg Genie. It is the ultimate hard- boiled egg cooker of all times. No fuss, no muss and it can cook up to seven perfectly hard-boiled eggs each and every time. Follow the prep directions that come with it, plug it in, sit back and await the buzz of the timer, transfer the cooked eggs into a bowl of cold water to cool and then peel and enjoy. Washing the plastic components is probably the least enjoyable part of the process.


Tonight, as I was reading through a few blogs and surfing for some easy and different recipes, I came across what I considered to be a very interesting recipe as well as a challenge to The Egg Genie: Oven Baked Hard-Boiled Eggs.


Thinking about the chilly and rainy weather we're experiencing this evening, I considered this a perfect opportunity to step up to the plate and take the challenge:


The Egg Genie VS The Electric Oven.


Here are the step-by-step instructions that I followed to bake one dozen hard boiled eggs:


Preheat your oven to 325. Place once dozen eggs into a standard 12-count muffin pan. Bake for 25-30 minutes. Remove from oven and let stand 5 minutes.


Some of the eggshells may have a few brown spots on them after the baking process, but these will wash off easily in the water and do not leave a blemish on the edible part of the egg. (My egg shells are brown; I doubt this will happen to the white egg shells.)


The shells on two of my eggs split open during the baking; I think I overcooked them. No big deal - they'll be used in a delicious egg salad tomorrow!


Place the cooked eggs into a cold water bath to cool for handling; this also prevents the yolk from turning green. Because my eggs were very fresh (home grown), the shell peeled somewhat hard - the same as they do when cooked in The Egg Genie.


After the cooked eggs are cool enough to handle they can be peeled and eaten in your favorite recipe.


AND THE WINNER OF THIS CHALLENGE IS:

IT'S A TIE!!!!

The eggs from both methods were cooked to perfection as well as great tasting. The Egg Genie method serves a good purpose when it's only necessary to cook up to seven eggs and the Baked in the Oven method serves a good purpose when it's necessary to cook up to 12 eggs. Both methods require light washing of the cookware (neither serious) so bottom line....it depends on how many bellies are to be fed.

- - - - - - - - - - - - - - - - - - - - - - - - - - - - - - - - - - -


A TIP FOR PEELING YOUR EGGS:


Roll the cooked egg between the palms of your hands or on a table top to loosen up the shell. Break open one end of the egg and insert the tip of a kitchen teaspoon between the white and the shell and run it around the entire inside of the shell. This will separate the shell from the egg white for a quick and clean peeling. : )


- - - - - - - - - - - - - - - - - - - - - - - - - - - - - - - - - -

THANK YOU GIRLS!
COME TO MAMMA!


Monday, February 27, 2012

How to Make Homemade Pizza Dough Using a Bread Machine

There's a story behind my bread-making machine worth sharing. To say my husband loves bread is an understatement. Subsequently, he presented a bread-making machine to me as a Christmas present many, many years ago. I made several attempts to produce homemade bread with this new piece of equipment but was never successful. At that time I was working a full-time job, running a household and probably had much less patience then than I do now. I decided I wasn't intelligent enough to work the darn thing so I put it away and forgot about it. Now skipping forward many, many years I decided to clean out some storage in the basement when I came across this piece of forgotten equipment. I brought it out of hiding and once again decided to attempt to put it to good use one more time. My husband couldn't understand how the process could possibly be that difficult and he finally came to the conclusion that the machine was malfunctioning. Duh. Now remember the time period has advanced several years while it was in storage. The bread-loving husband wasted no time. He took it back to store where he purchased it and asked for a replacement since this one hasn't worked from day one. With no questions asked he was given a new model as an even exchange. He brought it home to me and I've been baking with it ever since with little effort. I have a lot of respect for my new bread making machine and have rewarded it a position on the counter top where it belongs instead of in the dusty old basement.

Bread machines come with a booklet that provides the exact instructions and information necessary to operate and produce a great finished product with pizza dough being one of the easiest recipes to follow.

The ingredients are so simple it's frightening.

For 2 pounds of pizza dough:

3/4 tsp. salt
4 cups all-purpose flour
2 tsp. active dry yeast
1-1/4 cups warm water (115 F)
3 tbsp. olive or vegetable oil

Yes, that's all there is to it.


To prepare:

Add the following measured ingredients to the bread baking pan in the following order:

warm water (115 degrees F)
olive or vegetable oil
flour and salt


Before adding the yeast, use your finger to form a well (hole) in the top of the flour where you will pour the yeast. The yeast must never come into contact with a liquid when you are adding ingredients.

Prep done. Now return the baking pan to the breadmaker.


Carefully snap the baking pan into the breadmaker. Close the lid of the bread machine and plug the power cord into the wall outlet. Select dough setting  (see #7) and press Start/Stop. When the unit signals and display reads "0.00" press Start/Stop and remove dough. The whole operation will take 1-1/2 hours. It's not necessary to keep an eye on the baking process (so go ahead and do some laundry or make a salad and/or dessert) but be alert to stop the process when complete in 1-1/2 hours. 

Turn out the finished dough from the baking pan onto desired (lightly greased) pizza pan(s). Using your fingertips and/or the palms of your hands pat the dough evenly over entire pan(s). I always use a 12" x 17" pan for making pizza (see pic).

Really, it doesn't get any easier than this. Now the fun begins.


Preheat the oven to 400 F.

Spread the pizza sauce over the dough. (Hopefully you made the Pizza Hut copy-cat recipe I provided in another post.)


Sprinkle cheese over the sauce.


Add other desired toppings: pepperoni, sausage, peppers, onions, etc. and bake 15 -20 minutes or until crust is golden brown.


In reality, this post is being provided mainly for anyone who either does not own a bread machine (or has one stored in the basement somewhere) in support of it's usefulness.

This simple and easy pizza dough recipe is being shared in hopes that I can encourage someone else to join me in taking another step closer to self-sufficiency through the use of a simple piece of equipment such as a breakmaker. Then you too will feel the same great sense of satisfaction as I do when taking this masterpiece of a pizza from your oven and serving to your family and friends. Think how much fun this can provide as a family shared activity and WOW what a great learning experience for the kids to carry forward.


Thursday, February 23, 2012

Vegetable Beef Barley Soup

This delicious soup, brimming with tasty and colorful ingredients, is comforting on any day of the year. Using preserved vegetables from my summer garden give an added goodness to the flavor.

Here at my house we enjoy this soup on a crisp winter day as well as on a hot summer day when our house is chilled by the air conditioner. The three main ingredients, all picked fresh from my vegetable garden at peak and canned, are crushed tomatoes, string beans and carrots. This recipe can be modified in many different ways: omit the meat for a vegetarian style soup; with or without barley; add a small type of pasta; use beef or vegetable stock; add your favorite spice(s), add additional vegetables; etc. I'm presenting this as another way to use home-grown garden ingredients to prepare a quick, easy, nutritional and extremely good tasting soup that, in itself, is good enough to be the main entree....and as encouragement for you to join the sustainable movement of gardening and preserving.


Ingredients:
  • 1 quart of crushed tomatoes
  • 1 quart of sliced carrots
  • 1 quart of string beans
  • ground beef (an amount to your liking)
  • 1-2 onions chopped (to your taste)
  • 1 cup of rolled barley
  • salt and pepper (to your taste)
  • and secret ingredient - MINT (picked fresh from home and dried in my dehydrator - in a not so fancy used jar)

Directions:

In a large soup kettle/pot fry the ground beef with the onions on medium heat breaking the beef into small pieces until the meat is thoroughly cooked.


Add the crushed tomatoes and the liquid from the string beans and the carrots to the beef and onion mixture and bring to a boil.


Add the rolled barley, salt and pepper and mint to the pot and boil covered for 15 minutes. Consider adding other spices at this step.


I just remembered at this point that I had some dried tomatoes (not sun dried but dehydrator dried) in the freezer so I added them to the pot for additional tomato flavor. You could add a couple spoonfuls of tomato paste or beef bouillon for an enhanced broth flavor also. 


Add the already cooked string beans and carrots to the boiling pot and simmer for a few minutes more until the vegetables get good and hot.
 
It's time to serve!

The final result is always outstanding...as it should be. With the just-picked garden-fresh tasting ingredients and the hand-picked spices and choice flavoring, it's custom made just for you!
This is not a recipe...it is a creation!