Kindness

Kindness is essential in our daily lives.
I will share weekly a new post with a message of how powerful kindness really can be.
Showing posts with label Preserving. Show all posts

Monday, April 4, 2016

Super Summer SALSA Recipe Rated A+

Many, many times I have surfed the net looking to find 'that perfect' recipe. Many, many times after following 'that perfect' recipe it turns out to be not-so-perfect. I would even go so far as describing it as a disappointing flop.  Regardless, I never give up on my search efforts. And, yes, on several occasions I have managed to find that recipe which provides me with A+ results. Bottom line - any recipe I share has been tried and true; I want to spare those who love to cook as much as I do the heartache of a 'flop.'

Described by myself as A+, the original salsa recipe I found on-line had to be tweaked a tiny bit to my liking to achieve this rating. For those with any cooking ability tweaking a recipe is no big deal; per your liking simply switch up the spices or add more of the ingredients you favor such as onions, garlic, etc. or lessen the ingredients you dislike. No, it really doesn't take a rocket scientist to make it happen; just a few fearless taste buds.

First, I'd like to preface by saying that the process of making salsa is not for the faint of heart. The prep for this wonderful food product requires a lot of effort as described through the steps in the recipe I am providing. Rewards of the efforts are plenty: healthier (no preservatives); amazing cost savings if ingredients are home grown; personal satisfaction; pantry enhancement; self-sufficiency; convenience; etc.

If the garden produces another great yield of tomatoes, peppers and onions, I will definitely double (or triple) this recipe. If necessary, I can also visit the local farmer's market for fresh ingredients.


So here goes,

SUPER SUMMER SALSA RECIPE


Ingredients:

8 cups tomatoes - peeled, seeds removed, chopped and drained
3 cups chopped onions
2 cups chopped green peppers
1 tsp. red pepper flakes
2 tbsp. garlic powder
2 tsp. cumin
2 tsp. black pepper
1/8 cup canning salt
1/3 cup sugar
1/3 cup white vinegar
1 15 oz. can tomato sauce

Directions:
  • Mix all ingredients together in a large sauce pan.
  • Bring to a boil and simmer for 15 minutes.
  • Pour into prepared jars.
  • Process in hot water bath for 15 minutes.
This recipe provided me with 8 pint jars of salsa. You can get more or less by increasing or decreasing the ingredients listed.


Information on preparing jars and other canning questions can be found at Ball Fresh Preserving and Canning Questions

Tuesday, August 28, 2012

Pickled Beets Recipe

The beet belongs to the same family as chard and spinach. However, unlike these greens, both the root and the leaves of beets are eaten. Beet leaves have a lively, bitter taste similar to that of chard. Attached to the beet's green leaves is a round or oblong root. Although typically a reddish purple hue, beets also come in varieties that feature white or golden roots. Because of their high sugar content, beets are delicious when eaten raw, but are more typically cooked or pickled. Beets are the main ingredient in borscht, a traditional eastern European soup.

Most any time of the year you'll find pint jars of pickled beets stored on my pantry shelf and frozen cooked beets in my freezer ready to compliment any meal. Pickled beets are delicious with hot dogs, hamburgs, grilled cheese sandwiches or, for that matter, any other choice of sandwich; frozen beets can be enjoyed as a side dish to any meal served. Pickled beets also make for a great item to take on either a picnic or as a dish-to-pass.

I began growing my own beets and pickling them some 20 years ago using an heirloom recipe which was shared with me by a much older friend and neighbor who also enjoyed for many years preparing this very same recipe for his family - the only difference being he purchased his beets locally from a farm stand whereas I grew my beets in my backyard garden. This year my newly-built raised bed is providing an ample amount of beet harvest to meet my needs as well as the needs of other interested recipients. (I'm pleased to say that this year I was able to barter some beets for some extra string beans.)

My choice of beets, as shown in some of my pictures, is the oblong beet. They take less time to cook and are simply simple to slice.  It is a requirement that the recipes I collect and prepare are fairly simple because if it's too complicated it's no fun and if it's no fun "get me out of here."

Picked Beets Recipe - Heirloom Style

Prepare beets (3-4 lbs dependng on size):

Wash and cook your beets:

Before cooking your beets cut off beet greens leaving 2" attached to root vegetable (to help them bleed less while cooking.) Wash the beets and place them in a large pot filled with water and boil them until they are fork tender. A pressure cooker can also be used to cook the beets - I find it to be faster and not as messy.


Cool beets to touch:


After the beets are fork tender, transfer them to a cookie tray or large bowl to cool to touch.


Peel and slice beets:


Peel and slice desired amount of beets. *


* This recipe makes approximately 4 pints of pickled beets. I always triple this recipe which makes approximately 12 pints but if I add lots of onions I can get at least15-17 pints. Unfortunately when I made this batch I was out of onions. : (

 
Prepare utensils:

Wash the jars, lids and rings with hot soapy water.
Place the clean lids to be used in a pan of water and bring to a boil.


Marry the beets with the ingredients:

Ingredients:
  • 2 cups sugar
  • 2 cups water
  • 2 cups white vinegar
  • 1 tsp cloves
  • 1 tsp allspice
  • 1 tbsp cinnamon
  • onions (optional)

Combine all the ingredients into a large stock pot and bring to a boil stirring until the sugar has dissolved.

Add the cooked sliced beets to the pot and continue to boil slowly for 15 - 20 minutes.

Pack the beets with enough liquid to cover them into clean hot jars to within 1/4 inch of the top. Release any air bubbles using a non-metallic utensil.

Wipe the rims of the jars with a moist paper towel to remove any food residue to ensure a good seal. Place a hot lid onto each jar rim and hand-tighten the screw band. They are now ready to process in the boiling water bath:

  • Place a rack in the bottom of a large kettle and fill it halfway with water. Heat extra water in a saucepan as a reserve. Bring to a boil over high heat and carefully lower the jars into the pot using a jar lifter or a wire rack made for this purpose. Add more boiling water from your reserve until the water level is 2 inches above the tops of the jars. Cover the kettle and bring the water to a full boil. Reduce the heat and maintain a gentle boil for the entire processing period of 30 minutes.
At the end of the processing time remove the jars from the kettle with a jar lifter or wire rack and place them on a clean towel until completely cool.

Test the seals on the cooled jars by pushing on the center of the lid. If the lid feels solid and doesn't indent, you have a successful vacuum seal

Remove the screw bands from the sealed jars, wash them in hot, soapy water and put them away for another canning adventure.


Now this is what I'm talking about and....

don't forget to wash and steam the beet greens!


Tuesday, February 14, 2012

Preserving Tomatoes

It seems everyone today is living in the fast lane. Families are involved with activities involving work, school, shopping, church, children, etc. and this leaves them little time for meal prep so they are forced to buy processed foods from the grocery store to help prepare meals faster. Home processed tomatoes can be the basis for many recipes that are healthier, more nutritious and can be stored on the pantry shelf right at your fingertips. If you're unable to grow your own tomato plants (or not interested in doing so) there are many places where you can purchase them in quantity - local farm stands and farmer's markets are great places to shop.

If you choose to preserve tomatoes in jars you'll need to have a quantity of  glass canning jars - pints and/or quarts. [Tip: check with your older neighbors who may have a surplus stashed in their basements or check your local Craig's list before the season begins for better pricing (or maybe even free) before you buy new.] Additionally, you'll need to purchase the appropriate size lids to fit the jars you choose to use - small mouth or large mouth. Freezing tomatoes is a much easier process if you have extra freezer space. I have never used this method but have heard from many people who have with success.

These steps I'm providing for preparing tomatoes for preserving may appear to be overwhelming for the beginner but they are not and the rewards outweigh the efforts. Remember, these steps are for getting the tomatoes to the point of either canning them or freezing them. I do not remove the skin from the tomato as called for in many other recipes. This eliminates a rather tedious step and aids in maintaining a thicker sauce.

Preparing the tomatoes:


  • Wash and assemble a large quantity of fresh tomatoes.
  • Core the center of the tomatoes - do not peel them. If you are fussy about the seeds they can be removed with your fingers at this step. Remember to compost the cores.


  • Cut the unpeeled tomatoes into pieces that will fit into your food processor and puree.


  • Pour the pureed tomatoes into a large container.


For freezing purposes the process is complete. There is no cooking involved. Using a wide-mouth funnel and a ladle fill your pint, quart or gallon size freezing bags, label them with content and date and store them in your freezer for future use.

If you plan on canning your pureed tomatoes in jars you must follow the hot pack method:


Preparation of jars:

For preparing jars, it is recommended that you wash them in hot soapy water and rinse well. Place them in a large pot of water or water bath canner and boil gently for 10 minutes. Leave them in the hot water until needed. Then using tongs remove a few jars at a time and place them upside down to drain. They are ready to use in less than a minute.
I use a less traditional method to prepare my jars that is easier and has worked for me successfully for many, many years: wash and rinse the jars and place them in your dish drainer in the kitchen sink. Using a tea kettle (I use two electric kettles) bring tap water to a boil. Pour the boiling water into jars. Taking one jar at a time, empty the hot water out and proceed to step 3 listed below. Although this method works for me I cannot recommend it for everyone.

Step 1:  Hot Pack Process
  1. Pour pureed tomatoes into an appropriate size kettle to accommodate your yield and bring it to a boil while stirring continually. Boil for 5 minutes.
  2. While waiting for the tomato mixture to boil, place the jar lids in a small sauce pan filled with clean water and bring to a boil. Leave the lids in the hot water and remove them as needed.
  3. After the tomatoes have finished boiling, use a wide mouth funnel and a ladle to fill the prepared jars immediately with the hot tomato mixture leaving 1/2 inch head space.
  4. Add 1 teaspoon of salt to each quart jar; 1/2 tsp to each pint jar.
  5. Wipe the rim of each jar with a clean cloth or paper towel, place a clean lid on the top of the jar and apply the screw band.
Step 2:  Boiling Water Process

Fill a large kettle with the appropriate amount of hot water and begin heating it on the range. The water bath canner requires 1 to 2 inches of water above the tops of jars. This can be difficult to determine before the filled jars are in place but after a batch or two you will learn how much water you you have to add. It is always a goodtomato sauce recipes idea to have an extra small pot of water heating just in case.

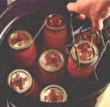
Place jars on rack immediately after packing. Lower filled rack into canner. If you don't have a pan with a rack you can simply use any large kettle and place a small towel on the bottom of the pan. Jars should be covered by 1 to 2 inches of water. Add additional boiling water if needed. If you add more water, pour between jars and not directly on them (this is where the extra pot of heated water comes in handy). Cover pot with lid. When the water comes to a rolling boil, start to count the processing time.* Reduce heat slightly and boil gently for the time recommended for the food being processed. When the cooking time is up, remove jars at once and place on a rack or on towels away from heat and away from any draft. Keep jars separated to allow for air space.

After the jars have cooled, test them for seal. To do this press down on the center of the lid. The lid should be con-caved and not move when pressed.

When the jars are completely cool, the screw bands may be removed if desired but not necessary. Be sure to label the canned jars with content and processing date.

Store jars in a cool dark, dry place. If there is a possibility of freezing temperatures during storage, cover the jars with a blanket or heavy cloth. Jars may also be placed in a box and stuffed with newspaper.


* Processing times:
Pints 35 minutes
Quarts 40 minutes

Approximate Yields:
22 pounds whole tomatoes for canner load of 7 quarts.
14 pounds whole tomatoes for canner load of 9 pints.

Tomatoes-Crushed
Ideal for use in soups, stews, sauce and casseroles.


A good reference site:  http://www.foodsafetysite.com/consumers/resources/canning.html


Thursday, March 10, 2011

Freezing corn for the winter

The fresh taste of corn from the cob can be a reality in the dreaded winter months. Eating it as a vegetable side dish or as the main ingredient of homemade corn chowder is an awaking of your taste buds.

Buying a dozen ears of corn at your local farm stand is usually less expensive than buying 4 or 5 ears at your favorite supermarket and probably much fresher; growing it yourself is better yet. Cook the entire dozen in a large kettle as you  normally would.

Simply by stripping the cooled corn from the cobs that were left from immediate consumption into a flat pan or bowl starts the process. The fastest and easiest way to do this is by using an electric knife.  Zip, Zip, all done! If you don't own an electric knife a serrated steak knife works. USE CAUTION.

The majority of the corn kernels stripped from the cob will be in long strips so it'll be necessary to break these up into smaller pieces. This is the time when you'll steal tastes (yum).

Using a large spoon fill whatever size freezer bag meets your needs for serving size. I use a quart size bag and weigh it with my scale for consistent contents. Make sure there is no air in the bag and then pat them flat for storing in your freezer one on top of the other. These are only suggestions. For a family of one, pint bags may work and if you have a small freezer it certainly isn't necessary to flatten the bag.

Once you've tasted your own frozen fresh garden corn it'll be hard to go back to store bought canned corn. Believe me, I haven't been doing this for 20 years for nothing!  Enjoy!

P.S.  It's usually cheaper to buy a whole bushel of corn so consider splitting the cost of the purchase with a friend or two and splitting the efforts too.  Good idea?
  

Sunday, March 6, 2011

Black Raspberry Jam...to die for!

During the summer 2010 I began feeling down about not having crops to harvest from the lack of any at-home vegetable garden. With nothing to harvest for the first time in 20 years I directed my concentration on filling the shelves in the cold storage room with jellies and jams. The first 2010 batch of jam produced in my sweet little kitchen (and my favorite flavor to eat by far) was the black raspberry jam. The picking, being the first ever for berries other than here at home, was done in the sweltering heat of summer in Baldwinsville. Other than not remembering to bring some much needed cold water to quench our thirst, I developed an intestinal problem (yes, there were portable buildings for this  - yuk) and my picking partner husband tripped and spilled the majority of the berries he had already picked onto the ground lost forever. Losing the berries from that fall proved to be a blessing because we hadn't realized we over picked until we went to pay for our purchase and was given the bill. Whew, I had no clue how much this was going to cost, so I was in sticker shock; duh, it would have been wise to ask what the price per pound was before starting to pick. In the end we had way more than enough berries for making an ample supply of black raspberry jam to die for. I'd like to report that I have already ordered some black raspberry bushes from my favorite supplier and I can't wait for them to arrive in the spring for planting. Possibly in the next year or two I'll be able to harvest them here in my very own backyard where I'll be closer to public utilities. : )


The Results of a Hearty Rhubarb Patch - Pineapple Strawberry Rhubarb Jam

In the earlier days when my mom was younger I used to take a vacation day from work and join her at her house where we would prepare, cook and freeze at least 15 rhubarb pies to enjoy through the winter months. Mom would prepare the dough basically by recall and roll it out with her trusty dowel into the pie plates. I would pick, wash, slice and prepare the rhubarb for the filling. There were two ovens cooking pies at all times (one in the kitchen and one in the basement). After each pie cooled off it was double wrapped in foil and placed in the freezer for future eating. It was an all-day job but sooooo rewarding. Just pull the frozen pie out of the freezer on a cold winter day and pop it in the oven for reheat and now you’ve got a great comfort dessert. This truly represents fond memories of what one calls the good old days. F.Y.I. Rhubarb is a vegetable that is prepared and eaten like a fruit. A good website for lots more info on rhubarb:  http://gardening.about.com/od/vegetables/a/Rhubarb.htm  Not doing that many pies anymore I took the time last year to find another great use for my rhubarb. I struck it rich when I made this jam recipe. I went to the Aldi’s grocery store and bought the ingredients at a lower cost so it wasn’t that expensive to prepare. I did invest in some ‘made for jelly’ canning jars that were a little more costly but I’ll be using these again, and again, and again. This is the recipe I used (which I doubled):

Simple Pineapple Strawberry Rhubarb JamPINEAPPLE STRAWBERRY RHUBARB JAM

4 c rhubarb, cut into 1/2 pieces
4 c sugar
1 can crushed pineapple 8 oz
1 pkg. strawberry jello 3 oz

Mix sugar and rhubarb and allow to stand until juice exudes (even overnight).  Boil 12 minutes at a rolling boil.  Add pineapple and simmer 3 minutes more.  Remove from heat; add jello and stir until dissolved.  Pour into sterilized jars and seal.

You’ll be surprised at the flavor – it doesn’t taste at all like rhubarb.  Let me know if you try this and how successful it was.

If you’ve never canned before you’ll need to learn the correct method to prepare your jars.  It’s not that difficult and by following these steps you’ll avoid the problem of not having your jar seal properly.
http://www.bellaonline.com/articles/art2816.asp

The Art of Making Grape Jelly

Realizing that the lack of garden crops would leave the shelves in the cold storage room barren I made every effort to come up with some substitutes to fill those empty shelves. First I started looking in and around my own backyard. Aha!  Mom and Dad have an enormous grape arbor in their backyard and with mom no longer making grape jelly I gladly picked from their arbor an amount of grapes that would produce enough grape jelly for their pantry as well as mine. 

The grapes were at their peak at picking time but I wasn't able to fit the processing of grapes to jelly in my schedule on that day. Not to worry, the weather was cool so I set them outside on a patio table under an umbrella in a somewhat shady area to hold them over until I had an opening in my schedule for processing. During their second night of being outdoors a mighty windstorm swept up onto the deck and flipped the basket of grapes over crushing the majority of them.
Another grape picking trip to the home of my parents sent me away with two bountiful baskets of terrific concord grapes.  Wanting to be sure that I got the job done I started the process of straining the juice that evening and continued the process again on the next day.  It wasn't until the third day that I actually made the jelly. This fall I'll do it all over again (with the exception of storing the grapes outside on the table). 

To some it might seem like an endless chore, but to me it was a labor of love.